Grilled Romaine with Tahini Dressing

Guys, I wish I could say we were busy whipping up a million new recipes for you which is why we haven’t posted the entire month of July. But actually, it’s a little more exciting. One of our very own got engaged! Congrats, Sonia! So, as you can imagine, we’ve had some other things on our brains. But, we’re ready to jump back into it. We missed you guys!

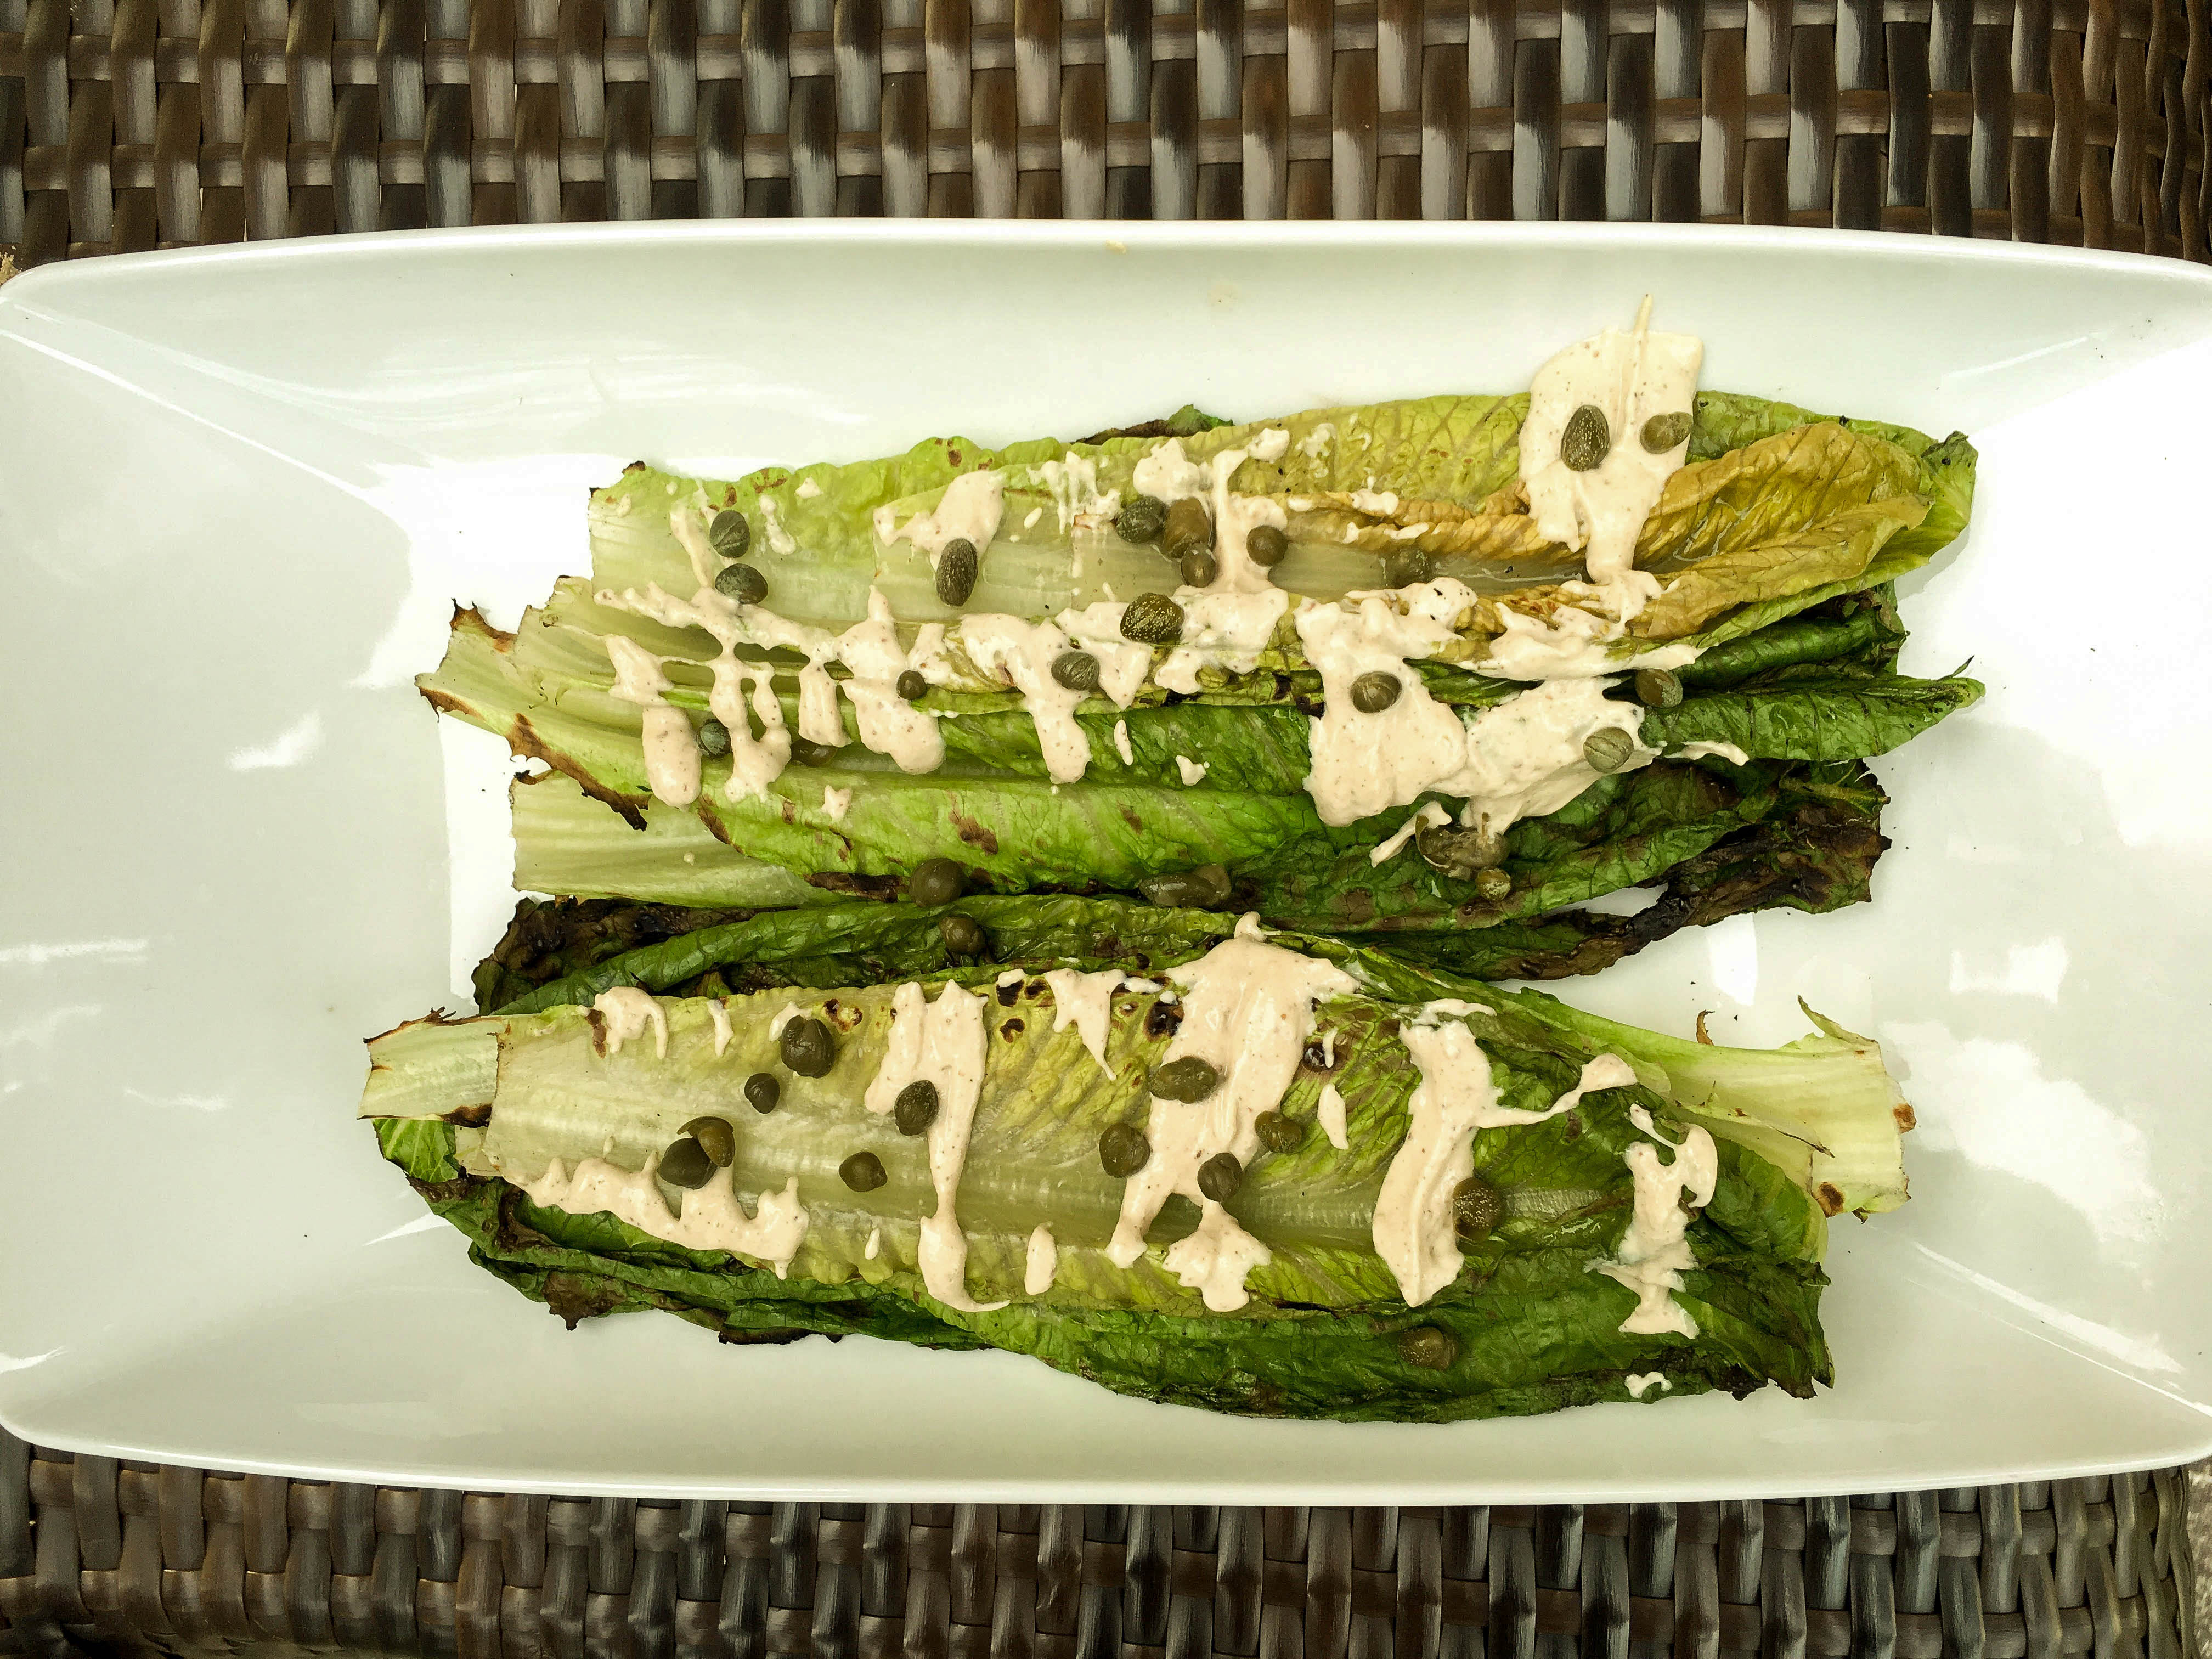
With all that’s going on now, we’re going to keep it super simple. Like toss-it-all-in-a-processor simple. We’re well into grilling season and I’m not gonna lie – there’s only so many ways you can grill chopped veggies before they get boring. I mean, we love you spicy veggies, but we need a change. Enter: grilled romaine. But not just plain romaine, romaine with tahini dressing. Not only does the romaine give you a smokey taste, but the tahini gives it an extra nutty and savory kick.

  • 2 cups tahini
  • 1/2 cup of olive oil (or extra oil from the tahini)
  • 1 garlic clove, minced
  • Juice of 1 lemon
  • 1 bunch romaine lettuce
  • 2 tbsps capers

In a food processor (or by hand), toss in the tahini, garlic, and lemon juice. Pulse all of the ingredients together until smooth and creamy. If you notice it’s getting too thick, add in more oil and a slight bit of water. It should have the consistency of a creamy dressing when you’re done.

For the romaine, clean and separate the leaves. Grease the grill and bring to medium heat. Place the leaves on the grill (over a tiny flame is a-ok), and let them crisp for 2-3 minutes. Just the edges of the leaves should brown.

When serving, pour the tahini dressing over the romaine and top with capers.

Grilled romaine_damndelish-2

Happy Eating, XO.

Homemade Hummus

Listen, I’m a huge fan of store bought, however my mom made me a convert the last time she was visiting me in Philly. She blended up a batch of her home made hummus for me to dip with carrots and then a few other flavors for me to use with the kebabs she brought. My oh my, trust me when I say, its WAY better. Silver lining is, its almost as easy/quick as opening the store bought container.

  • Tahini (see it wasn’t JUST for that shaved brussels sprout recipe, you silly non-believers)
  • Garbanzo beans/chick peas (canned stuff kids)
  • 1 Lemon
  • Garlic (as much as you want really, 1-3 cloves)

Optional Flavor I: Roasted red peppers
Optional Flavor II: Cilantro & Jalapeño
Optional Flavor III: Black Olives
Optional Flavor IV: Avocado
Optional Flavor V: Jess’ Basil

So yea you get the point, there are multiple flavors, but even the original or base flavor is so yum! It’s also a nice way to use up anything you may have going bad. I always have cilantro leftover from my chimichurri sauce recipe or who doesn’t always seem to have an avocado that went from firm to ripe too fast? So throw it in the hummus and get to snacking! As you know hummus is also a good/healthy sub for mayo in wraps and sandwiches. Plus, recently, I ate a hummus stuffed omelet at this French/Lebanese brunch spot (shout out to Cafe La Maude) that rocked my world. So yeah, make some, you won’t be disappointed.

Happy Eating, XO.

Your Own Personal Pizza (No sharing required.)

My husband and I like to think we’re pretty easy going when it comes to pizza, but the truth its, we’re not. At all. He likes meat-y, cheesy, greasy pizza. Where I want something more light and refreshing – yes, a pizza can be refreshing, guys (see ingredients below). So, I decided to solve this problem by making us each our own batch of dough to top with whatever we please. (It’s like we’re 5 years old again and need our OWN batter or we don’t want it at all.) If you’re in the same boat or just want a small pizza to nosh on, this one’s for you. No sharing required.

Pizza dough:

  • 3 cups all-purpose flour
  • 1/4 tsp salt
  • 2 1/4 tsp active dry yeast
  • 1 cup warm water
  • 2 tbsp canola oil

Toppings:

  • 2 tsp olive oil
  • 1 tsp truffle oil
  • 1 cup mozzarella cheese, cubed
  • 1/2 cup parmesan cheese, shredded
  • 2 cups arugula
  • 1/2 of a fresh lemon
  • Salt and pepper to taste

Making the dough:

In a mixing bowl with the dough attachment, combine 1 1/2 cups of the flour, the salt and the yeast. Add the warm water and canola oil. (If you don’t have a dough attachment, you can use the flat beater or the whisk.) Beat the ingredients on low for 30 seconds until fully combined, then gradually add in the remaining flour. Beat on medium-high until a dough begins to form. (If you have a dough attachment you can skip this next part.) Turn the dough out on to a lightly floured surface and knead until smooth and elastic.

On a cookie sheet, divide the dough in half (one for you, one for your significant other…) cover, and let sit for 10 minutes to rise. At this point, if you want to store the dough for later use, spray two ziplock bags with cooking oil and place the dough inside each. You can freeze the dough up to 3 months.

Topping your pizza:

If you’re ready to use right away, preheat your oven to 400 degrees. On your floured surface, roll the dough out to roughly 1/2 inch high for thin crust, or 1 inch high for regular. Brush on the olive oil and truffle oil, leaving space along the edge for the crust. Layer on the mozzarella and parmesan cheese. (If you don’t have a pizza pan like me, but want to keep the round shape, flip over a cookie sheet and bake the pizza on top of it.) Bake for 15 to 20 minutes until the crust is golden and the cheese is melted.

A couple of minutes before pulling it out of the oven top it with the arugula. When it’s completely done squeeze the fresh lemon (sans lemon seeds) over the whole thing. Sit back and enjoy the fact that you can have it aaalll to yourself.

Personal White Pizza

Happy Eating, XO.

Lemon Basil Sorbet

Happy Memorial day!! Although the official first day of summer is still a couple of weeks away, we’re prepping you by giving you a “cool” homemade dessert. I went on vacation to Florida back in April (while, somehow, it was still freezing in the Northeast) and I saw lemon basil sorbet on a menu. I’ll take two, please. Of course, I had to come home and try to make it for myself. I’m a real sucker for herbs in anything – cocktails, desserts,  facewash. No joke.  Plus, how hard could it be to make a glorified icee?

*If you’re using an ice cream maker like I did, don’t forget to freeze it overnight before making this recipe. If you don’t have an ice cream maker, don’t worry, you can still make this!

  •  3 cups of water
  • 1 cup sugar
  • 1 cup large basil leaves
  • 1 cup of lemon juice
  • 2 tbsp lemon zest

Combine the water and sugar in a small saucepan and bring to a boil. When fully combined, turn off the heat, throw in all of the basil and let it steep for 10 minutes.  This will create a basil syrup. Once cooled, strain out the basil leaves and add in the lemon juice and lemon zest. (Not gonna lie, throw in some vodka and this could be an awesome cocktail!) Hook up your frozen ice maker and slowly pour in the lemon basil syrup creating an icee/sorbet consistency. If you don’t have an ice cream maker, pour it in to an airtight container and store in the freezer, scraping it with a fork every hour until you get that sorbet consistency.

You can store this in an airtight container for up to three months.

Lemon Basil Sorbet


Happy Eating, XO.

Spring Lavender & Lemon Cookies

When you think of spring, what do you think of? Flowers, pastels, fresh everything. So why not transfer all of that goodness in to a cookie? No joke. I don’t know what made me want to do it, but I tried putting lavender in a cookie and it was like spring in my mouth. I promise, you can eat lavender, and it’s actually good for you! It helps with any stomach problems you may be having. Not to mention, your house will smell like a lavender field. #Instantzen.

*What’s not instant is the dough for this recipe. It has to sit for at least 3 hours or overnight before use.

  • 1/2 cup powdered sugar
  • 1 tbsp dried lavender, finely chopped
  • 2 tbsp lemon zest
  • Two sticks of unsalted butter, room temperature
  • 2 1/4 cups all-purpose flour
  • 1/4 tsp salt

In a mixing bowl, mix together the first three ingredients: powdered sugar, lavender, and the lemon zest. Then, add in the softened butter until it’s a paste consistency. Slowly add in the flour and salt (you know the drill: add a little, mix, add a little, mix) until it becomes a chunky dough. On wax or parchment paper, or these awesome reusable baking sheets, kneed and roll the dough together to form a smooth “log”.  (The thickness of the log is how big your cookies will be, and how long it is = how many cookies you can get from it. Now get your mind out of the gutter. We’re talking about spring cookies here.) Wrap the log in plastic wrap and chill for 3 hours or overnight.

When you’re ready to make the cookies, preheat the oven to 375 degrees. Unwrap the log and start slicing it into pieces 1/4″ thick. I was able to get roughly 2 dozen cookies. Place them on a greased cookie sheet and bake for roughly 15 minutes.

Lavendar Spring Cookies

Happy Eating, XO.