Foodie Fave: Avocado Chocolate Mousse

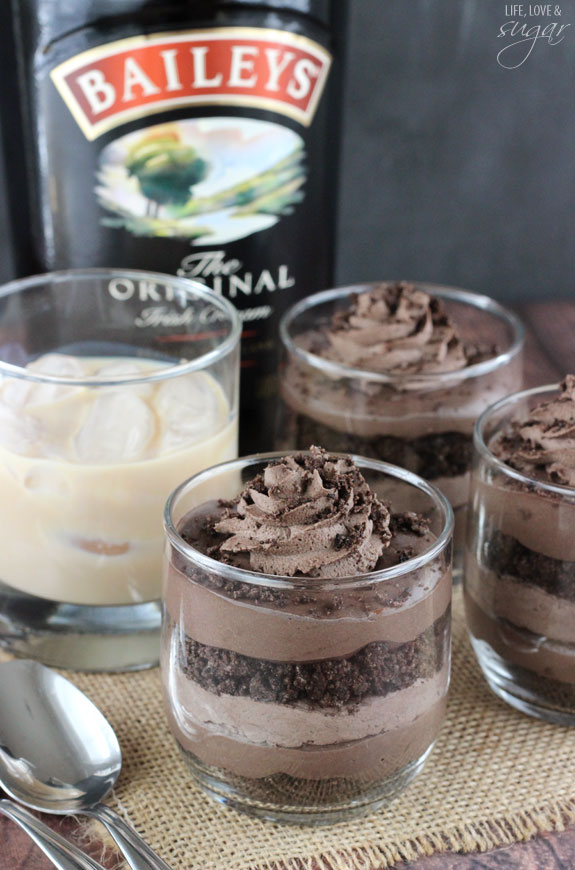
I recently bought a TUB of coconut oil. Completely by mistake, mind you. That’s what happens when you late-night shop on Amazon. Anyway, I’ve managed to use it for a couple of things – chapstick, moisturizer, hair mask. However, I’ve been a bit nervous about trying it out in food. I don’t necessarily want my eggs to taste like coconut by using it as an oil.

I’ve tried mixing it with peanut butter like this recipe calls for. But let’s just agree that you don’t want to see the blob it actually came out as. #nailedit

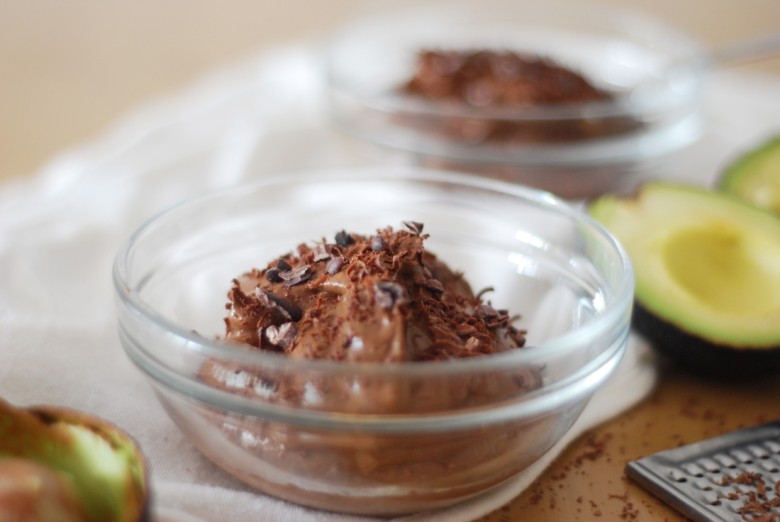
Luckily, I came across Anna Eastick’s blog Heart+Bowl. She has super healthy bowl recipes like this drool worthy chocolate mousse recipe, with coconut oil!  I’ve been seeing avocado mixed with chocolate for a while now, so it’s about time we give you a damn delish recipe for it.

  • 1 large ripe avocado (or 2 small)
  • 1 tbsp raw, unsweetened cocoa powder
  • 1/4 cup coconut milk (or any nut milk of your choice)
  • 2 tbsp honey or maple syrup
  • 1 tbsp coconut oil, melted
To serve
  • 1 chunk of bittersweet dark chocolate, grated
  • 2 tsp cocoa nibs (optional)

In a food processor, purée the avocado until smooth. In a jug, combine the cocoa powder and milk until a smooth paste forms. Add the cocoa and milk mixture to the avocado, along with the remaining ingredients. Blend everything together until smooth and well combined. Transfer the mixture into individual bowls and chill in the fridge until ready to serve. Top with grated bittersweet dark chocolate and sprinkle over cocoa nibs.

Avocado Chocolate Mousse

Happy Eating, XO.

Foodie Fave: Mini Baileys Chocolate Cheesecake Trifles

Just when you think chocolate couldn’t get any better, Lindsay from Life, Love, and Sugar adds Baileys to it and totally blows us away. She has a recipe for the perfect bite size chocolate trifles (think: P.F. Changs’ mini desserts). Plus, it has cheesecake and Oreos. #Drooling. I made a test batch of these bad boys and it was like eating a dream. I dare you to try them as well!

Cheesecake layer:

  • 16 oz cream cheese, room temperature
  • 1/4 cup sugar
  • 1/4 cup cocoa
  • 4 tbsp Baileys
Whipped cream and cookies:
  • 1 cup heavy whipping cream, cold
  • 2 tbsp Baileys  (Note: I decided to leave the Baileys out of the whipped cream)
  • 1 1/2 tbsp cocoa
  • 3 tbsp powdered sugar
  • 15 Oreo cookies, crushed
Beat the cream cheese, sugar and cocoa together in a bowl until smooth. Add Baileys and mix until well incorporated. Set aside. In another bowl, whip heavy whipping cream until it starts to thicken. Add Baileys, cocoa and powdered sugar and continue to whip until stiff peaks form. (This is where I left out the Baileys).
To make the trifles, divide half of the cookie crumbs evenly between the four cups (or jars) and spread into an even layer in the bottom of the cups. Pipe or spoon, an even layer of cheesecake filling on top of the cookie crumbs in each of the four cups. You should only use about half of the filling. Pipe, or spoon, an even layer of whipped cream on top of the cheesecake filling in each of the four cups. Divide remaining cookie crumbs between the four cups and evenly distribute the second layer of crumbs on top of the whipped cream. You can keep a little bit of crumbs aside, if you want to use them to sprinkle on top of the finished trifles. Pipe, or spoon, remaining cheesecake filling on top of cookie crumbs, distributing evenly between the four cups.

Top each trifle with a swirl of whipped cream and a few more cookie crumbs, if you kept some aside. Refrigerate until ready to serve. Lindsay recommends setting them out for about 15 minutes prior to eating, so that they aren’t too firm.

Baileys_Chocolate_Cheesecake_Trifles2

Happy Eating, XO.

Almond Biscotti

As I sat down to write this post I remembered, “Oh yeah, I should grab some of this biscotti I have leftover in the fridge.” This is the third batch I’ve made in two weeks…

The first time I made this biscotti I tested it on my family and it was gone in two days, followed by threats that they needed more asap. The second time, I made it for my husband and myself to make sure I could make it just as good. I did. It was. The third time I made it as a gift. I obviously became confident in it quickly. All I’m saying guys, is that this recipe is versatile. You can make it for anyone, for any occasion and it will be amazing no matter what.

  • 1 1/4 cups whole almonds, no salt
  • 1 3/4 cups flour
  • 2 tsp baking powder
  • 1/4 tsp salt
  • 2 large eggs, plus 1 large white beaten with pinch salt
  • 1 cup sugar
  • 4 tbsp unsalted butter, melted
  • 1 1/2 tsp almond extract
  • 1/2 tsp vanilla extract
  • Oil spray

This is going to seem like a ton of steps, but I promise, once you make it once, you won’t forget how to do it.

Preheat oven to 375. Pulse 1 cup of almonds in a food processor until finely ground, place in a bowl and set aside. Pulse the remaining 1/4 cup into roughly chopped chunks and also set aside in a bowl. Again in the processor, combine the flour, baking powder, and salt and transfer to a bowl. (Yes, you’ll need a lot of bowls, and yes, the food processor is your best friend for this recipe.)

“Scramble” the eggs in the processor until they’ve lightened and almost doubled in volume. While the eggs are being scrambled, slowly add sugar until thoroughly combined, as well as the melted butter, almond extract, and vanilla. Transfer egg mixture to medium bowl. Sprinkle half of flour mixture over egg mixture and gently fold until just combined. Add the ground and chopped almonds. Fold in remaining flour until a dough begins to form.

At this point you can either refrigerate the dough for a couple of hours, or bake right away. When you’re ready to bake, separate the dough into two rectangles, flattening them slightly to roughly 2″ high. Coat the spatula with a little bit of oil and smooth over the loaves. Beat the egg white until foamy, then brush on top of the two loaves to give them a crisp finish.

Bake the loaves for 25 minutes. They’ll begin to crack on the top. At this point, take them out of the oven and let them cool for 30 minutes. Before putting them back in the oven, slice them on an angle roughly 1″ thick. Lay the slices on their side and bake for the last 30 minutes until golden brown.

Biscotti


Happy Eating, XO.

Pound Cake even pickey eaters will love

We are smack dab in the middle of strawberry season and I couldn’t be happier. These plump red berries are one of my favorites, so I’m definitely taking advantage of them. Their freshness balances perfectly with sweet pound cake and the tartness of the balsamic vinegar. This dessert is sure to please everyone.

Fun fact: Pound cake gets it name because you use one pound each of flour, sugar, eggs, and butter. I’ve slightly modified that (let’s be honest, that’s a LOT of sugar and butter), but it’s still just as good!

Pound cake

  • 3 tsp baking powder
  • 3 cup flour
  • Dash of salt
  • 2 1/2 cups sugar
  • 3 sticks unsalted butter (room temperature)
  • 6 medium
  • eggs2 tsp vanilla extract
  • 3/4 cup milk

Whipped cream & Balsamic

  • Heavy whipping cream, chilled
  • 1/4 cup sugar
  • 1/4 cup balsamic vinegar (chocolate balsamic vinegar is also AH-MAZING with this)

Preheat oven to 325 degrees. Grease a bread pan then sprinkle with flour to prevent sticking. Whisk together the baking powder, flour, and salt. In a separate mixing bowl, mix together the sugar and butter until light and fluffy. Add eggs one at a time, then add the vanilla extract and milk.

Gradually add the flour mixture until fully combined. Pour the batter into the bread pan and bake for roughly an hour and 10 minutes, until a toothpick comes out clean. (If the top looks like it’s browning too fast, cover it with tin foil. Thanks for the tip Martha Stewart!)

While the cake is baking, combine the cream and sugar and begin whisking on high speed for 5 minutes, or until a fluffy consistency forms. (Or just use Cool Whip!).

When the cake is done, let it cool in the pan for 10 minutes before cutting. To serve, slice the cake, top with strawberries and a dollop of whipped cream. Hollow out the middle of the whipped cream and pour in the balsamic. Ta da!

Pound Cake

Happy Eating, XO.

Spring Lavender & Lemon Cookies

When you think of spring, what do you think of? Flowers, pastels, fresh everything. So why not transfer all of that goodness in to a cookie? No joke. I don’t know what made me want to do it, but I tried putting lavender in a cookie and it was like spring in my mouth. I promise, you can eat lavender, and it’s actually good for you! It helps with any stomach problems you may be having. Not to mention, your house will smell like a lavender field. #Instantzen.

*What’s not instant is the dough for this recipe. It has to sit for at least 3 hours or overnight before use.

  • 1/2 cup powdered sugar
  • 1 tbsp dried lavender, finely chopped
  • 2 tbsp lemon zest
  • Two sticks of unsalted butter, room temperature
  • 2 1/4 cups all-purpose flour
  • 1/4 tsp salt

In a mixing bowl, mix together the first three ingredients: powdered sugar, lavender, and the lemon zest. Then, add in the softened butter until it’s a paste consistency. Slowly add in the flour and salt (you know the drill: add a little, mix, add a little, mix) until it becomes a chunky dough. On wax or parchment paper, or these awesome reusable baking sheets, kneed and roll the dough together to form a smooth “log”.  (The thickness of the log is how big your cookies will be, and how long it is = how many cookies you can get from it. Now get your mind out of the gutter. We’re talking about spring cookies here.) Wrap the log in plastic wrap and chill for 3 hours or overnight.

When you’re ready to make the cookies, preheat the oven to 375 degrees. Unwrap the log and start slicing it into pieces 1/4″ thick. I was able to get roughly 2 dozen cookies. Place them on a greased cookie sheet and bake for roughly 15 minutes.

Lavendar Spring Cookies

Happy Eating, XO.