Tater Tots

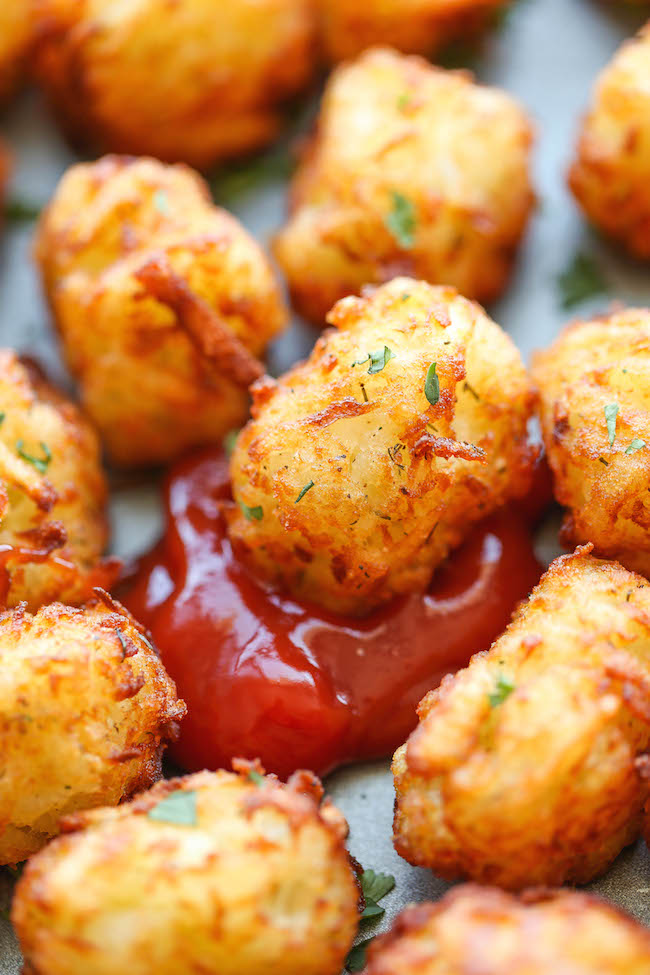
I’m OBSESSED with Dunkin Donuts hash browns. Mainly because they are so flavorful but it’s also their texture. They are soft on the inside and crispy on the outside. They almost look like circular tater tots and that’s why I got the idea to try and recreate them at home. Granted for 99 cents you cant go wrong, however with the weather getting better and hot dog season approaching, I figured a good tater recipe would come in handy for most folks. Also, I’m not a huge dill fan so I substituted with chives, but do whatever herbs you like. Just get some flavors going in the tots, try paprika, etc. just experiment!

  • 2 pounds russet potatoes, peeled
  • 1 tablespoon all-purpose flour
  • 1 teaspoon garlic powder
  • 1/2 teaspoon onion powder
  • 1/4 teaspoon dried oregano
  • 1/4 teaspoon dried dill
  • Kosher salt and freshly ground black pepper, to taste
  • 1 cup vegetable oil
  • 2 tablespoons chopped fresh parsley leaves

Place potatoes in a large saucepan and cover with cold water by 1 inch. Bring to a boil and cook until parboiled, about 6-7 minutes; drain well and let cool. (don’t forget that it says to par boil, if u cook too long the shredding will be difficult) Using a box grater, finely shred potatoes. Using a clean dish towel or cheese cloth, drain potatoes completely, removing as much water as possible. Transfer potatoes to a large bowl. Stir in flour, garlic powder, onion powder, oregano and dill; season with salt and pepper, to taste. The mixture should be workable but dry. (Make sure you salt and season the mixture very well. You could also try french onion soup mix with the other seasonings)  Form potatoes into tots (make sure you oil your hands to form tots because mixture is gummy). Heat vegetable oil in a large stockpot or Dutch oven over medium heat. Add tots to the skillet, 5 or 6 at a time, and cook until evenly golden and crispy, about 3-4 minutes. Transfer to a paper towel-lined plate.

IMG_3537edit

*TO FREEZE: Transfer cooled tater tots to an airtight container. Freeze up to 1 month. To bake, preheat oven to 400 degrees F and bake until heated through, about 15-17 minutes

Happy Eating, XO.

Nouveau Seekh Kebabs

Don’t get startled by the fancy French word in front of an old Pakistani or Punjabi classic. I am just taking a family favorite and adding a short cut or twist, hence the new or nouveau seekh kebabs. Ok so let me back up for some of you novices. A seekh kebab is just like any other kebab because its base is ground meat, but the reason for it being different is that the meat is wrapped around a skewer when grilled so when it’s served there is hole running through it. In culinary speak, this is done so the cooking time is shorter and the kebab stays moist instead of drying out (also so the kebab stays whole). Ok so typically this is made with mutton, I just didn’t have time to stop at a specialty store to get that so I went with ground beef, but note you can make this with ground chicken or turkey if you want to lighten this snack up as well.

Here is the nouveau secret: instead of chopping cilantro and using an egg as a binder I used Trader Joe’s cilantro dressing. That’s right, my seekh kebab mixture has salad dressing in it! Ok so I know aunties everywhere are cringing, but try this out and tell me if you don’t love it.

  • 1 lb. ground meat (mutton or beef) **Note I used 80/20 beef since I wanted enough fat to add flavor and moisture.
  • 1 tbsp. ginger paste
  • 1 tbsp. garlic paste
  • 1 tsp. ground cumin or jeera powder
  • 1/2 tsp. of garam masala
  • salt to taste and chaat masala to dust on after cooking
  • finely chopped onion (1 medium is what the recipe said and that was definitely way too much, go half an onion at the most)
  • 2-3 tbsp. of cilantro dressing
  • finely chopped green chili (3 if using the Indian ones and 2 if using a jalapeno or bigger chili)
  • don’t forget salt & pepper, I did and it just killed it with no salt

If baking, set the oven to 475 degrees and oil your hands when molding into kebab shape so they don’t stick. If you are cooking it on the charcoal grill or grill pan, cook it on high heat. Do not even try to get around the using a bamboo/metal stick. If you have noticed there is no filler in these kebabs so they WILL fall apart unless cooked in the traditional seekh kebab fashion around a skewer. Hope you enjoy!

Served with hummus, ketchup, or mint chutney.

FullSizeRender

Happy Eating, XO.

Warm Spring Salad

Finally! We’re getting in to fresh produce season! Not that I mind all of the comfort food that fall and winter brings, but you just can’t beat a fresh homemade salad. And this one includes the perfect “cross-over” ingredients.

Salad

  • 2 cups of arugula
  • 1/2 of a sweet potato, quartered
  • 1/2 can of beets
  • 1/3 cup walnuts

Dressing

You can mix together our lemon-y salad dressing, or make the dressing below.

  • Apple cider vinegar
  • Olive oil
  • Salt and pepper

Set your broiler to high. Toss the quartered sweet potato in olive oil and a dash of salt. Spread it out evenly on a cooking sheet and stick it under the broiler until it begins to soften and brown, approximately 10 minutes. (This is the same way you can make sweet potato fries. Just cut them thin instead of quartered.) When the sweet potato is just about done, throw in the walnuts to get them warm and slightly toasted.

In a salad bowl, throw together the arugula, beets, and warm sweet potato and walnuts. Toss with the dressing and enjoy.

Warm spring salad

Happy Eating, XO.

Cinnamon rolls

Now that we’ve given you a couple of healthy snack options here and here, it’s time to bring back the gooey goodness that are these cinnamon rolls. Everything in moderation, right? Plus, these come with the satisfaction that you made these from scratch. No canned stuff here. Sweetness.

The dough (the usual suspects):

  • 4 cups all-purpose flour
  • 4 tsp dry yeast
  • Pinch of salt
  • 3/4 cup milk
  • 1/2 cup water
  • 1/2 cup butter, melted
  • 1/2 cup sugar
  • 1 egg

I mean, if you really want to, you can buy a can of cresent rolls and connect them all together to make a sheet of dough. Even though it looks like a lot of steps, it’s just a lot of mixing. Just try it. You can do it!

The filling:

  • 1 tbsp butter, melted
  • ½ cup brown sugar
  • 2 tsp cinnamon

The icing:

  • 1 1/2 cups powdered sugar
  • 1 Tablespoon butter
  • ⅛ teaspoon vanilla
  • 2 Teaspoons hot water

Preheat your oven to 375 degrees. In a mixing bowl, combine 1 3/4 of the flour, all of the yeast, and salt. Then, in a small sauce pan over medium heat, stir the milk, water, melted butter, and sugar. Add the liquid mixture in to the flour mixture and whisk until fully combined. Add the egg and 1/2 cup of flour and continue to whisk together. Gradually add the rest of the flour until you get a dough-y texture. Knead the dough to get out any air pockets, then cover it and let it sit for 20 minutes to rise.

Time to work on the filling. Combine the brown sugar and cinnamon in a bowl. (Whew, that was hard…) When ready, roll out the dough in to a rectangle to about 1/4 inch thick. Spread the melted butter on top, and sprinkle the cinnamon mixture evenly on top, leaving a small border around the edges. Roll the dough tightly from the long end of the rectangle to create a “log”, and pinch the dough along the seam to hold it together. Slice it up in to 1″ thick pieces and lay them flat on a greased baking sheet. Bake them for roughly 20 minutes until they’re golden brown and smelling irresistible.

As for the glaze, whisk together all of the ingredients until you get a smooth, thick consistency and pour on top of the hot rolls.

Cinnamon Rolls

Happy Eating, XO.

Good Ol’ Blueberry Cornbread

Now, I’m not even remotely from the South, but every time I hear the word “cornbread” I feel like I have to say it with a southern accent, accentuating the “oooor”. Weird. I know. But you’re probably sitting there saying it, aren’t you? Not even in your head? Fine. But no matter how you say it, this cornbread is out of this world. And the blueberries in this cornbread have amazing color after baking. Perfect for a ladies brunch. Big hats and all.

I’ve always been a huge fan of cornbread, but too anxious to make it. I thought it was a lot harder than it was. But if it was hard, do you think we’d have it on our blog? Come on now…

  • 1 cup sugar
  • 1 stick of unsalted butter, room temp
  • 2 eggs
  • 1 cup yellow cornmeal (if you’re worried about having a ton of cornmeal left over, just remember, you can use it when making muffins, bread, pasta, etc. to create a nonstick surface)
  • 1 1/2 cups flour
  • 2 tsp baking powder
  • Dash of salt
  • 1 1/2 cups milk
  • 3 cups blueberries

Preheat your oven to 375 degrees. In a mixer with the paddle attachment, mix together the sugar, butter, eggs, and cornmeal. In a separate bowl, mix together the powdery items – flour, baking powder, and salt. Take 1/3 of the flour mixture and 1/2 cup of milk and pour it in to the batter. Fully mix together before repeating. (Flour, milk, mix. Flour, milk, mix. Reeeemiixx! Just kidding.) When you’re done mixing, fold in the blueberries. Grease a 15×10 pan with high sides, (or, I used two 7×7 pans) and pour in the gritty mixture. Bake for 50 minutes or until a fork comes out clean (just like cake!).

Blueberry Cornbread

Happy Eating, XO.